
Beading Guide
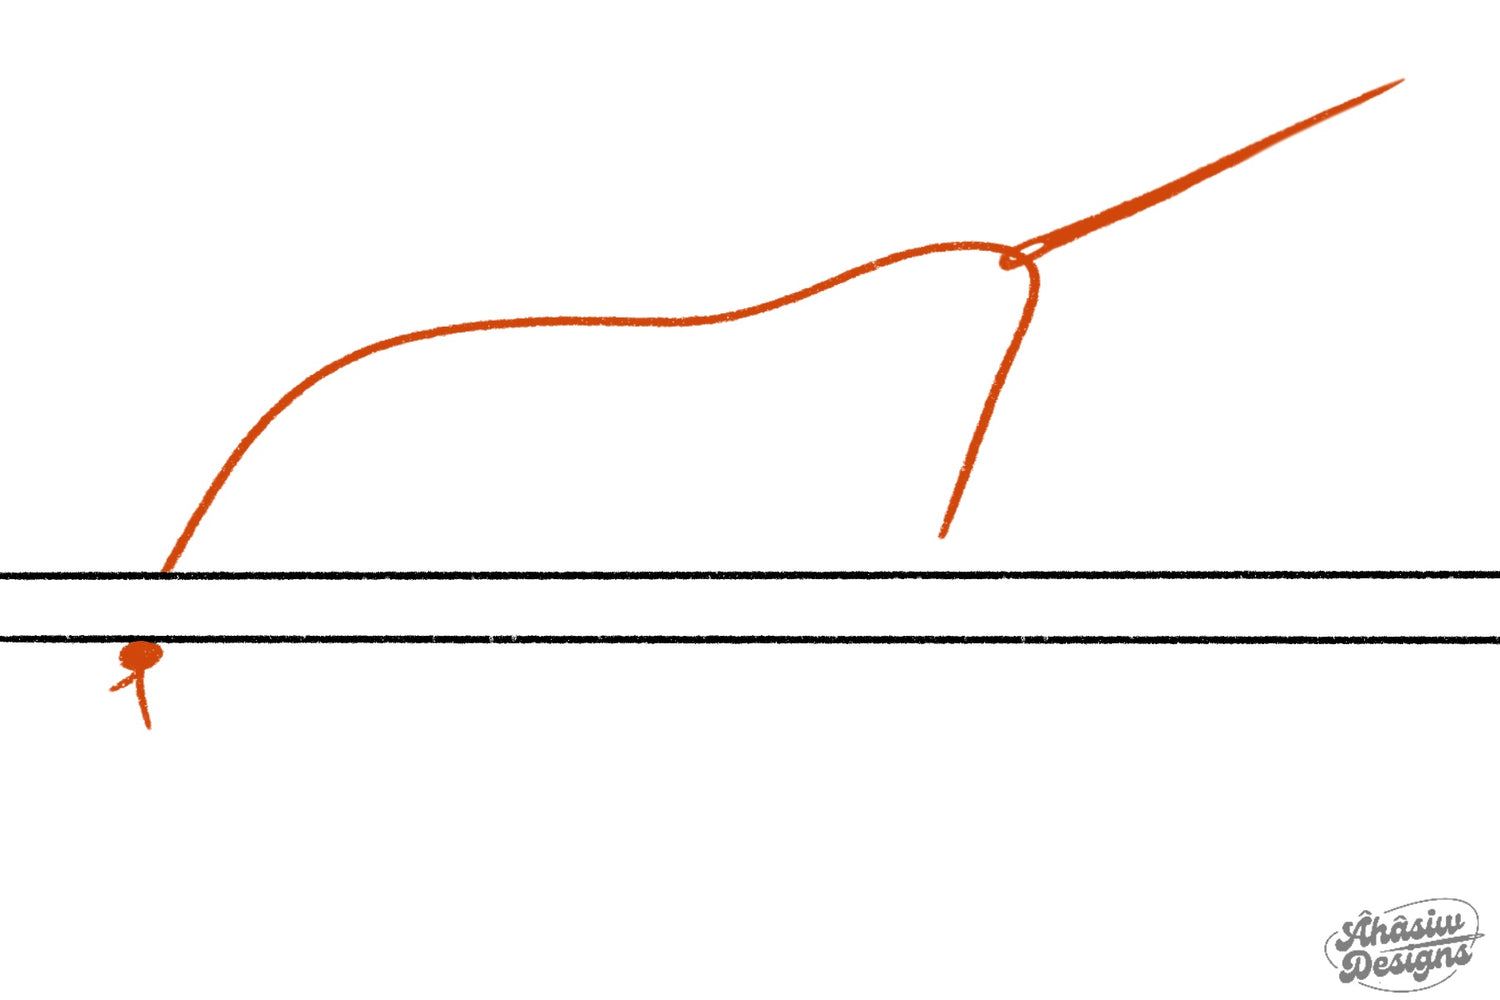
Step 1
Thread your needle, knot one end, and go up through your stiff felt.
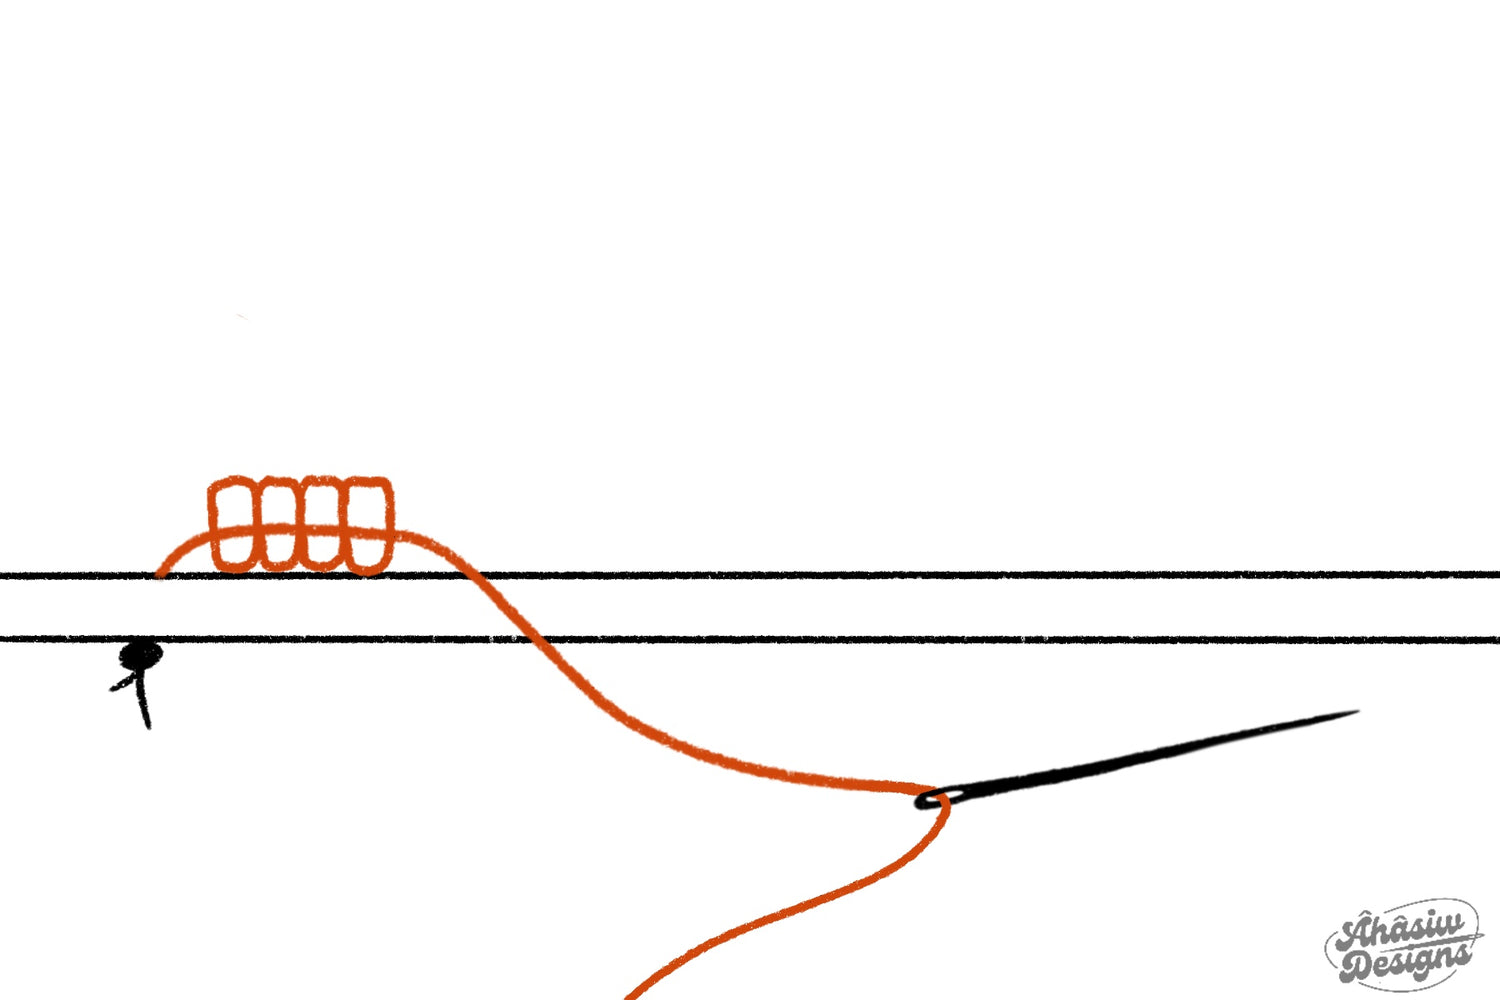
Step 2
Pick up 4 beads and tack them down, leaving about ½ - 1 bead’s worth of space between the last bead and the thread.
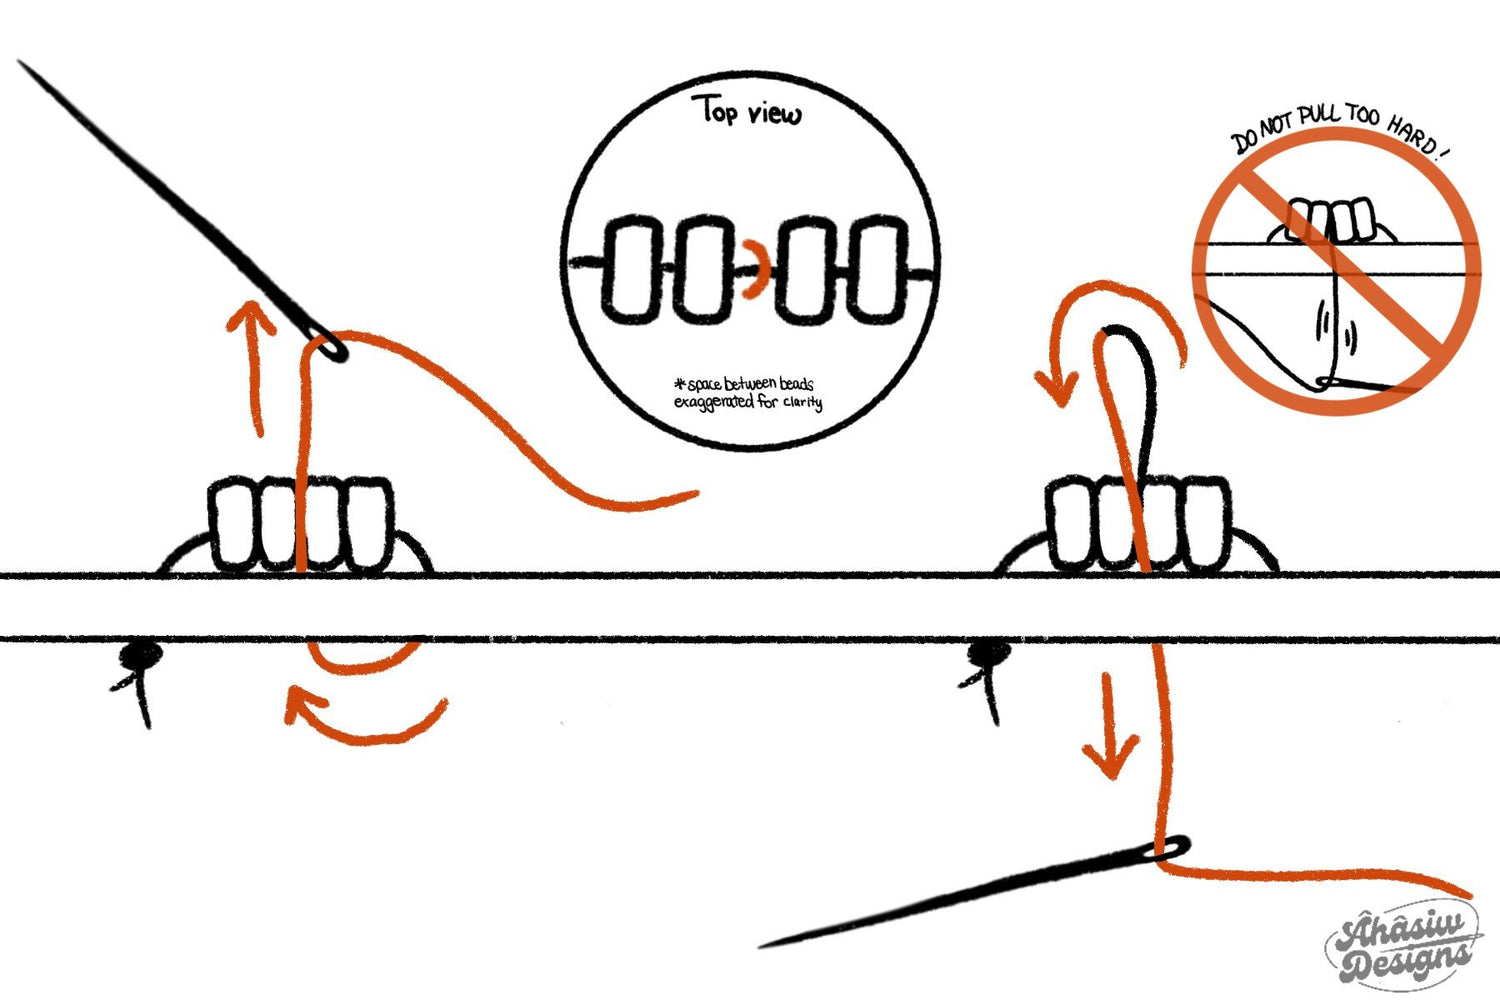
Step 3
Take the needle up through the 2nd and 3rd bead and go back down ensuring that the working thread is going over the thread that tacked down the 4 beads (see top view). Repeat this step for in-between the rest of the beads (1st – 2nd and 3rd – 4th). NOTE: Do not pull the thread too hard or else the beads will not lay flat.
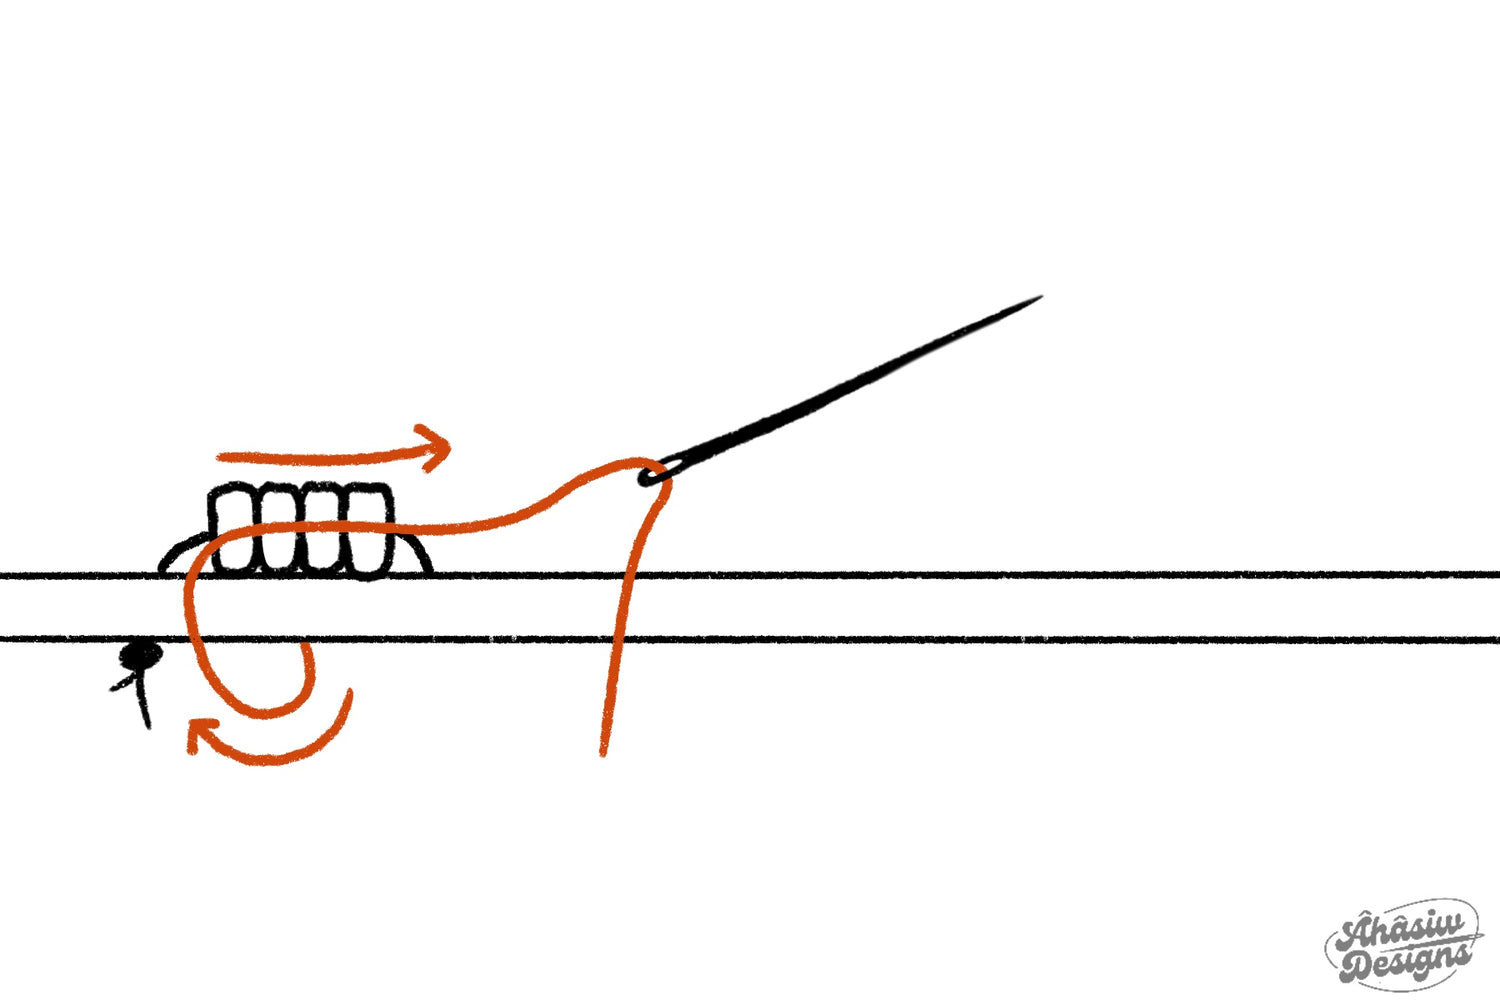
Step 4
Take the needle up before your 1st bead and thread through all 4 beads.
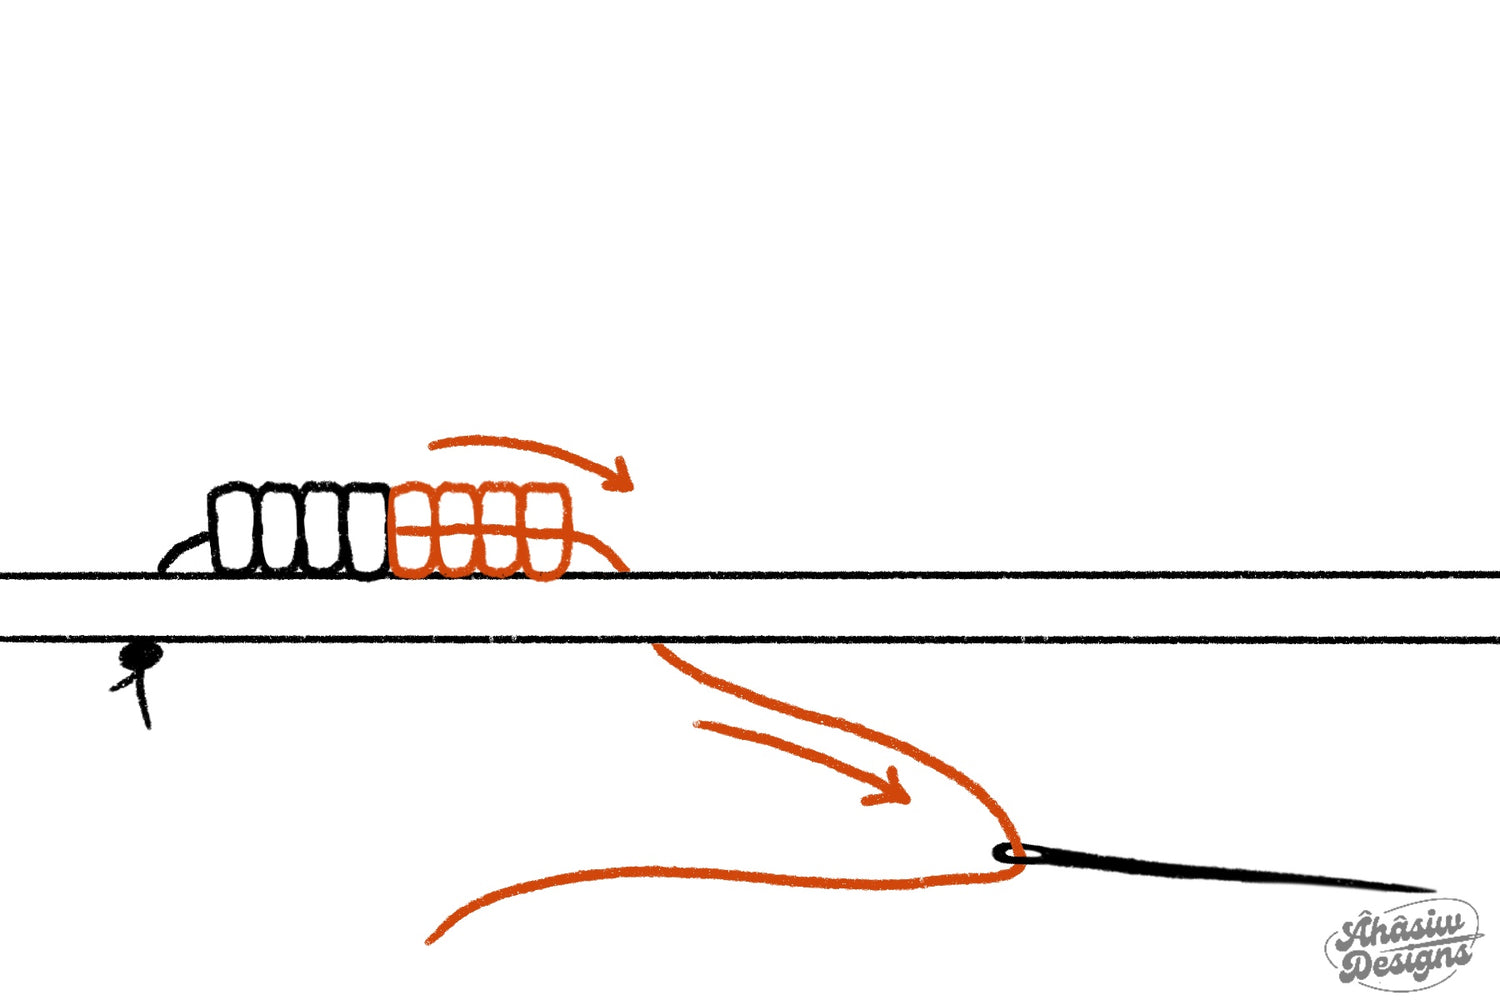
Step 5
Thread on 4 more beads and repeat steps 2 and 3.
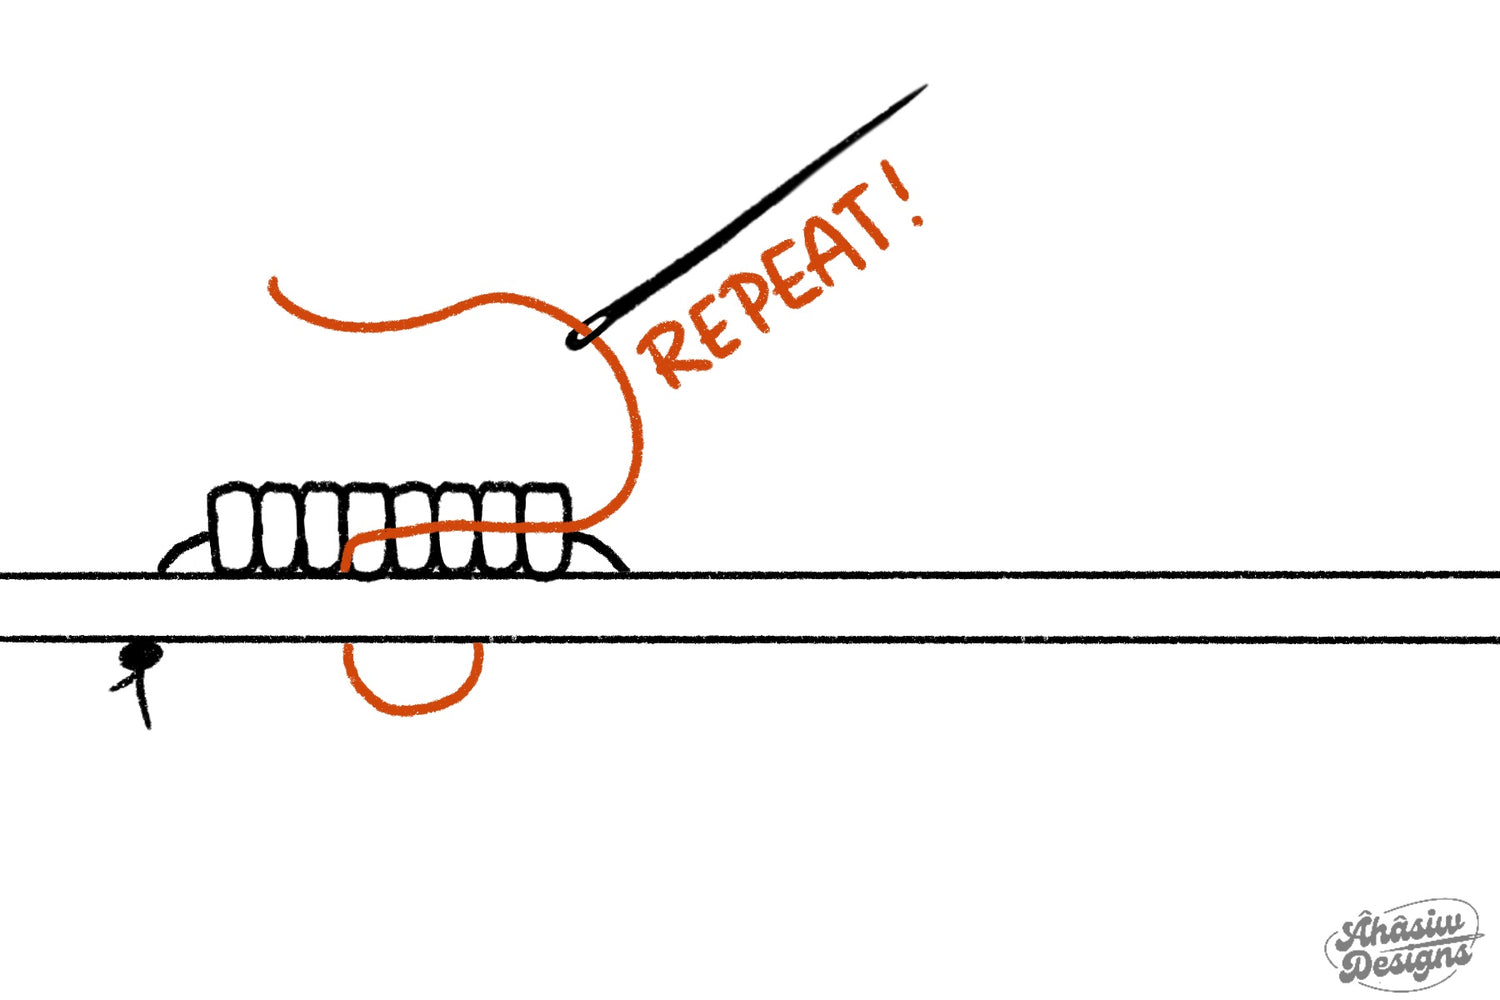
Step 6
fter completing steps 2 and 3 again, take your needle up before the 4th bead of your previous string of 4 beads. Then, thread through 5 beads total. Repeat steps 2, 3, and 6!
REMEMBER: this is just the basics! Sometimes you need to tack on more or less beads, or a particularly stubborn bead needs to be tacked down again, etc… be flexible and open to making mistakes! Good luck!